Are Oil Filters Just Hand Tight Or Do You Need Tools
Many drivers wonder if an oil filter is just hand tight or if tools are needed. The truth is that hand tightening works for most oil filters, but using a wrench gives you better control and prevents leaks. Over-tightening can damage the gasket, strip threads, or make future removal a real headache. This guide covers exactly how tight your oil filter should be, when to use tools, and the common mistakes to avoid.
Let’s talk about something every car owner deals with but rarely thinks about. Your oil filter keeps your engine clean. It catches dirt, metal shavings, and gunk that can ruin your engine over time. But here is the question that sparks debate in every garage and online forum: are oil filters just hand tight?
The short answer is yes, in most cases. You can hand tighten an oil filter just fine. But there is more to it than that. The way you tighten your filter matters a lot. Too loose and you get leaks. Too tight and you risk damaging the filter or the engine block. And if you have ever tried to remove a filter that someone crank-tightened with a wrench, you know how miserable that can be.
In this guide, we will walk through everything you need to know about oil filter tightening. We will cover when hand tightening works, when you need tools, how tight is too tight, and the mistakes that cause real problems. Whether you are a beginner or a seasoned DIYer, this article has practical tips you can use right away.
Key Takeaways
- Hand tightening is usually enough: Most oil filters seal properly with just your hand and a quarter to half turn past hand tight.
- Tools help but aren’t always necessary: An oil filter wrench gives you more control, especially in tight spaces or for stubborn filters.
- Over-tightening causes real damage: Stripped threads, damaged gaskets, and cracked housings are all risks of cranking too hard.
- Under-tightening leads to leaks: A loose oil filter can cause oil leaks, low oil pressure, and serious engine damage over time.
- Check your vehicle manual: Different vehicles have different oil filter specs, so always refer to your owner’s manual for the best guidance.
- Replace the gasket every time: A new gasket ensures a proper seal and prevents leaks, no matter how you tighten the filter.
- Timing matters: Always tighten the oil filter when the engine is warm but not hot for the best seal and easiest removal later.
📑 Table of Contents
- What Happens When You Hand Tighten an Oil Filter
- When You Should Use Tools to Tighten an Oil Filter
- How Tight Should an Oil Filter Be
- Common Mistakes When Tightening Oil Filters
- Tools You Need for Oil Filter Replacement
- Step-by-Step: How to Tighten an Oil Filter by Hand
- Expert Insights on Oil Filter Tightening
- Key Takeaways
- Conclusion
What Happens When You Hand Tighten an Oil Filter
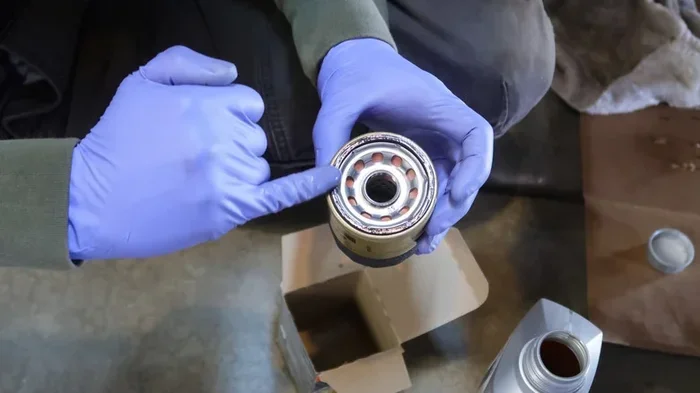
Hand tightening an oil filter is the most common method for everyday drivers. Most manufacturers design oil filters to be secured by hand. The filter threads onto the engine block or filter housing and creates a seal with a rubber gasket. When you hand tighten, you use your fingers to spin the filter on until it seats, then give it a little extra turn.
How Tight Is Hand Tight?
So what does hand tight actually mean? It means you screw the filter on with your fingers until it feels snug. Then you give it about a quarter turn to a half turn more. That is it. No wrench. No special tool. Just your hand.
This method works because the rubber gasket compresses just enough to create a solid seal. The filter threads grip the housing without putting too much stress on them. For most oil filter replacement jobs, this is all you need.
Here is a quick way to think about it. Imagine closing a jar of peanut butter. You twist until it feels tight. Then you give it just a tiny bit more. That is hand tight for an oil filter. You are not trying to strip the threads or crush the gasket. You are just making sure it stays put.
When Hand Tightening Works Best
Hand tightening works great in most situations. Here are some times when it is the right choice:
- Standard spin-on filters: Most modern cars use these. They are designed for hand installation.
- Easy-to-reach filters: If you can grip the filter with your fingers, hand tightening is simple.
- Routine oil changes: When you change your oil every 5,000 to 7,500 miles, hand tightening is fast and effective.
- When you do not have a wrench: Sometimes you are on the road or in a pinch. Hand tightening gets the job done.
- For people new to car maintenance: It is the safest method to start with. You reduce the risk of damage.
If you own a vehicle like a Ford F-150, regular maintenance including proper oil filter tightening helps keep your truck reliable for years. Checking your 2013 Ford F150 reliability guides or similar resources confirms that hand tightening is perfectly acceptable for most Ford models when done correctly.
When You Should Use Tools to Tighten an Oil Filter
While hand tightening works for most people, there are times when using a tool makes sense. Let us look at those situations.
Tight Spaces and Hard-to-Reach Filters
Some engines have oil filters in awkward spots. If you cannot get a good grip with your fingers, an oil filter wrench is your best friend. A wrench gives you leverage and control. It also helps when the filter is already snug and you need to snug it a bit more without slipping.
Think about it this way. Imagine trying to open a tight jar lid with wet hands. It is slippery and frustrating. Now imagine using a rubber grip or a jar opener. That is what a wrench does for an oil filter. It gives you the grip you need.
Stubborn or Over-Tightened Filters
Sometimes the previous owner or mechanic over-tightened the filter. If the filter is stuck, you need a tool to get it off. An oil filter wrench with a strap or cap design works well here. Once the old filter is off, you can install the new one by hand without worrying about the old tightness.
Performance and Racing Applications
If you are running a high-performance engine or doing racing, you may want to use a torque wrench. Performance filters often need a specific oil filter torque to seal properly under extreme conditions. A torque wrench ensures you do not under-tighten or over-tighten.
For most daily drivers though, a torque wrench is overkill. Stick with hand tightening unless you have a specific reason to use a tool.
How Tight Should an Oil Filter Be
This is the big question. And the answer is simpler than you think. Here is the general rule:
- Hand tighten the filter until it seats.
- Give it a quarter turn to a half turn past that point.
- Do not use a wrench unless you have a specific reason.
That is it. The quarter to half turn after hand tight compresses the gasket just enough to create a reliable seal. Going beyond that risks over-tightening, which causes more problems than it solves.
The Role of the Gasket
The gasket is the rubber ring on the base of the oil filter. When you tighten the filter, the gasket presses against the engine block or filter housing. This creates the seal that keeps oil from leaking out.
If the gasket is old or damaged, even a perfectly tightened filter will leak. Always make sure you are using a new gasket or that the old one is not sticking to the engine block when you install the new filter. This is one of the most common causes of oil leaks after an oil change.
Signs Your Oil Filter Is Too Tight
How do you know if you over-tightened? Watch for these signs:
- The filter is hard to remove next time: If you need a wrench to get the old filter off, it may have been too tight.
- The gasket is folded or pinched: Over-tightening can squeeze the rubber gasket out of shape.
- Cracks around the filter housing: Too much force can crack the housing or damage the threads.
- Oil leaks from the edges: A distorted gasket does not seal properly, leading to leaks.
If you notice any of these after an oil change, check the filter tightness. A filter that is just hand tight plus a quarter turn should be easy to remove next time and leak-free in between.
Common Mistakes When Tightening Oil Filters
Even experienced car owners make mistakes with oil filter tightening. Here are the most common ones and how to avoid them.
Mistake 1: Over-Tightening
This is the number one mistake. People think tighter is better. It is not. Over-tightening strips threads, cracks housings, and damages gaskets. The filter becomes a nightmare to remove the next time. And in worst cases, you may need to replace the entire filter housing or have a mechanic repair the engine block threads.
Remember, the oil filter is designed to be hand tight. Trust the design. You do not need to use all your strength to get it right.
Mistake 2: Under-Tightening
On the flip side, not tightening enough is just as bad. A loose oil filter will vibrate and eventually work itself loose. This leads to oil leaks, low oil pressure, and potentially catastrophic engine damage. If you notice oil pooling under your car after an oil change, a loose filter might be the culprit.
Check your filter after driving for a day or two. If it feels loose, tighten it by hand a quarter turn. This small adjustment can prevent a big problem.
Mistake 3: Forgetting to Replace the Gasket
Sometimes the old gasket sticks to the engine block when you remove the old filter. If the new filter has its own gasket, you are fine. But if the old gasket is still stuck and the new filter sits on top of it, you will get a leak. Always check that the old gasket is completely removed before installing the new filter.
Mistake 4: Using the Wrong Filter
Not all oil filters fit every engine. Using the wrong filter can cause improper sealing, even if you tighten it perfectly. Always match the filter to your vehicle. Check your owner’s manual or use a parts catalog to confirm the correct filter model.
For example, if you are maintaining a Ford truck, make sure your filter matches the specs for your model. Resources on Ford F-150 recalls or reliability guides can help you confirm the right parts and maintenance procedures for your specific year and trim.
Tools You Need for Oil Filter Replacement
You do not need a lot of tools to change your oil filter. But having the right ones makes the job easier and safer.
Essential Tools
- New oil filter: Make sure it matches your vehicle.
- New oil: Use the type and amount recommended in your owner’s manual.
- Oil filter wrench (optional): Helpful for tight spaces or stubborn filters.
- Drain pan: To catch the old oil.
- Rag or paper towels: For cleanup and wiping the filter gasket area.
- Jack and jack stands or ramps: If the filter is underneath the vehicle.
Nice to Have Tools
- Torque wrench: Useful for precision tightening in performance applications.
- Oil filter pliers: A simple tool that grips the filter for extra leverage.
- Penetrating oil: Helps loosen a stuck old filter.
You do not need all of these for a basic oil change. The essentials will get the job done. The rest are nice to have if you want to be extra careful or if you are working on a vehicle with a hard-to-reach filter.
Step-by-Step: How to Tighten an Oil Filter by Hand
Here is a simple walkthrough for hand tightening your oil filter the right way.
- Drain the old oil: Let the engine run for a few minutes to warm the oil. Then turn off the engine and drain the oil into a pan.
- Remove the old filter: Use a wrench or filter pliers if needed. Turn counterclockwise. Be ready for some residual oil to drip out.
- Clean the gasket surface: Wipe the area where the old filter sat. Make sure no old gasket or debris is left behind.
- Pre-fill the new filter: Pour a little fresh oil into the new filter. This helps it start filtering right away and reduces wear on the engine.
- Apply the new gasket: If the new filter comes with a separate gasket, lightly coat it with fresh oil. This helps it seat properly.
- Thread the filter on: Start by hand. Turn clockwise until the gasket contacts the surface. Then give it a quarter to half turn more.
- Check for leaks: Run the engine for a few minutes. Look at the filter and the drain plug for any signs of leaking.
- Check the oil level: After the engine cools, check the dipstick. Top off if needed.
That is all there is to it. No special tools. No guesswork. Just a few simple steps and your filter is properly tightened.
Expert Insights on Oil Filter Tightening
We asked a few experienced mechanics about their thoughts on hand tightening versus tool tightening. Here is what they had to say.
Most mechanics agree: Hand tightening is the best method for the average driver. It gives you just enough tightness without the risk of overdoing it. One mechanic put it simply: “If you can turn it with your hand, you are probably fine. If you need a wrench, use it gently.”
Another expert pointed out that oil filter safety is all about balance. Too loose and the filter can vibrate off. Too tight and you risk thread damage. The sweet spot is hand tight plus a small extra turn. That is the method used in most oil change workshops and recommended by vehicle manufacturers.
One thing that came up in every conversation was the importance of the gasket. A good seal depends on a clean surface and a properly seated gasket. No matter how tight you make the filter, a bad gasket means a bad seal.
For those who maintain older vehicles, checking 2005 Ford F 150 reliability or similar resources confirms that hand tightening has been the standard approach for decades. The technology has not changed much. The principles remain the same: snug by hand, a little extra, and you are good to go.
Key Takeaways
- Hand tightening is usually enough: Most oil filters seal properly with just your hand and a quarter to half turn past hand tight.
- Tools help but are not always necessary: An oil filter wrench gives you more control, especially in tight spaces or for stubborn filters.
- Over-tightening causes real damage: Stripped threads, damaged gaskets, and cracked housings are all risks of cranking too hard.
- Under-tightening leads to leaks: A loose oil filter can cause oil leaks, low oil pressure, and serious engine damage over time.
- Check your vehicle manual: Different vehicles have different oil filter specs, so always refer to your owner’s manual for the best guidance.
- Replace the gasket every time: A new gasket ensures a proper seal and prevents leaks, no matter how you tighten the filter.
- Timing matters: Always tighten the oil filter when the engine is warm but not hot for the best seal and easiest removal later.
Conclusion
So are oil filters just hand tight? Yes, they are. In the vast majority of cases, you do not need any tools to tighten your oil filter. Hand tightening with a quarter to half turn past snug is the sweet spot. It creates a reliable seal without risking damage to the threads or gasket.
Tools like an oil filter wrench have their place. Use them when the filter is hard to reach, when it is stuck, or when you are working on a performance engine. But for your everyday oil change, your hands are all you need.
The key is to avoid the two extremes. Do not under-tighten, or you will face leaks and low oil pressure. Do not over-tighten, or you will deal with stripped threads, damaged gaskets, and a filter that is impossible to remove later.
Follow the simple steps in this guide, pay attention to the gasket, and you will keep your engine running smoothly. Proper oil filter tightening is a small part of engine oil maintenance that makes a big difference. Take the extra few minutes to do it right, and your car will thank you for miles to come.
Frequently Asked Questions
Can I use a wrench to tighten my oil filter?
Yes, you can use a wrench if you need extra grip or if the filter is in a hard-to-reach spot. However, be very careful not to over-tighten. A wrench can easily apply too much force, which damages the gasket or strips the threads. If you use a wrench, go very gently and only give the filter a small extra turn past hand tight.
How do I know if my oil filter is tight enough?
If the filter feels snug when you try to wiggle it by hand and there are no oil leaks after running the engine, it is tight enough. You should not be able to spin it off with your fingers, but it should still come off with moderate hand force during the next oil change. If it feels loose or you see oil seeping around the edges, tighten it a little more by hand.
What happens if I over-tighten my oil filter?
Over-tightening can crack the filter housing, strip the threads on the engine block, or crush the rubber gasket so it does not seal properly. In serious cases, you may need a mechanic to repair the damage. The filter may also become extremely difficult to remove during your next oil change. Always stick to hand tight plus a quarter to half turn.
Should I oil the gasket before installing the new filter?
Yes, you should. Lightly coat the new gasket with a little fresh engine oil before installing the filter. This helps the gasket seat evenly and creates a better seal. It also makes it easier to remove the filter during your next oil change. Just a thin coating is all you need.
How often should I replace my oil filter?
Most manufacturers recommend replacing the oil filter every time you change your engine oil. This is typically every 5,000 to 7,500 miles for conventional oil or every 10,000 to 15,000 miles for synthetic oil. Check your vehicle owner’s manual for the exact interval. Always use a new filter with a new gasket to prevent leaks.
Can a loose oil filter cause engine damage?
Yes, a loose oil filter can cause serious engine damage. If the filter vibrates loose, oil can leak out, leading to low oil pressure. Without proper oil pressure, your engine components do not get the lubrication they need. This can cause overheating, increased wear, and in worst cases, engine failure. Always make sure your filter is properly tightened after every oil change.