Black and White Car Drawing Complete Tutorial Guide
This complete tutorial guide teaches you how to create stunning black and white car drawings from scratch. You will learn essential tools, step-by-step techniques, and expert shading methods that bring your vehicle sketches to life. Whether you are a beginner or intermediate artist, this guide covers everything you need to improve your car illustration skills. By the end, you will have the confidence and knowledge to draw realistic cars using just pencil and paper.
There is something truly satisfying about a black and white car drawing. It strips away all the noise of color and leaves you with pure form, shape, and contrast. Whether you are sketching a sleek sports car or a rugged truck, working in black and white forces you to focus on what really matters: the structure and soul of the vehicle.
If you have ever wanted to learn how to draw a car but did not know where to start, you are in the right place. This complete tutorial guide walks you through every step of the black and white car drawing process. From choosing your tools to adding final details, we cover it all. You will find practical tips, common mistakes to avoid, and expert insights that will level up your automotive art skills fast.
Drawing cars might seem intimidating at first. Those sharp lines, curved body panels, and complex angles can feel overwhelming. But here is the secret: every car is just a collection of simple shapes put together. Once you understand that, your car sketch journey becomes much more enjoyable. Let us dive in and explore the world of monochrome car art together.
Key Takeaways
- Start with basic shapes: Breaking down any car into simple forms makes the drawing process much easier and more accurate.
- Use the right tools: Quality pencils, erasers, and paper make a huge difference in your black and white car drawing results.
- Master shading techniques: Hatching, cross-hatching, and blending are the foundation of realistic car illustrations.
- Avoid common mistakes: Rushing proportions, skipping guidelines, and ignoring light sources are the top errors beginners make.
- Practice consistently: Regular practice with different car models builds your skills faster than any single tutorial.
- Study real vehicles: Observing actual cars helps you understand curves, lines, and details that make drawings look authentic.
📑 Table of Contents
- What Is Black and White Car Drawing?
- Essential Tools for Black and White Car Drawing
- Step-by-Step Guide to Drawing a Car in Black and White
- Shading and Texture Techniques for Car Drawings
- Common Mistakes to Avoid in Black and White Car Drawing
- Tips to Improve Your Black and White Car Drawing Skills
- Expert Insights on Mastering Black and White Car Drawing
- Conclusion
What Is Black and White Car Drawing?
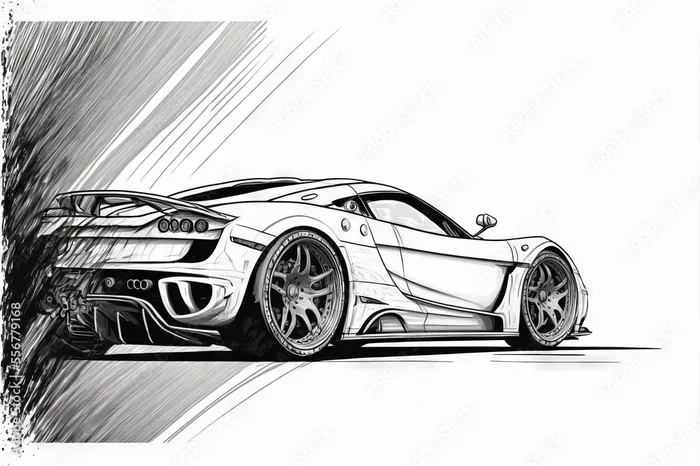
Black and white car drawing is the art of illustrating vehicles using only shades of gray, from pure white to deep black. Unlike color drawings, this style relies entirely on contrast and value to create depth, dimension, and realism. It is one of the most classic and timeless forms of automotive art.
Many artists prefer working in black and white because it removes the complexity of color theory. You do not have to worry about matching paint codes or choosing the right shade of red. Instead, you focus on lines, shapes, and pencil shading. This makes it an ideal starting point for anyone learning vehicle sketching.
The beauty of line art car drawings lies in their versatility. You can create a quick, loose sketch for concept work or a highly detailed, photorealistic rendering. Both styles use the same core principles. Once you learn those, you can draw any car you see, whether it is a classic muscle car or a modern electric vehicle.
Why Choose Black and White Over Color?
There are several reasons artists choose black and white car drawing over color work. First, it is simpler to manage. You only need to think about light and shadow, not hue or saturation. Second, black and white drawings often look more elegant and professional. They have a clean, timeless quality that many people find appealing.
Third, graphite drawing and pencil work are more accessible. You do not need expensive paints or digital software. A simple pencil and a sheet of paper are all you need to start creating beautiful car illustrations. This makes black and white car drawing one of the most approachable forms of automotive sketching for beginners.
Essential Tools for Black and White Car Drawing
Before you start your black and white car drawing, you need the right tools. The good news is that you do not need a lot. A few quality supplies will get you surprisingly far. Let us look at what you need and why each item matters.
Pencils: Your Best Friend in Car Sketching
The most important tool for any pencil drawing is, of course, the pencil itself. For car illustration work, you want a range of pencil grades. Hard pencils like HB and H create light, fine lines. Soft pencils like 2B, 4B, and 6B create dark, rich tones.
Here is a quick list of pencils to keep in your drawing toolkit:
- HB pencil: Great for initial outlines and light guidelines
- 2B pencil: Perfect for medium shading and defining shapes
- 4B pencil: Ideal for dark shadows and deep contrasts
- 6B pencil: Best for the darkest areas and dramatic effects
Having a variety of pencils gives you control over your value scale. You can move smoothly from light highlights to dark shadows, which is essential for realistic car drawing.
Erasers and Paper
Do not overlook the eraser. A kneaded eraser is perfect for lifting graphite and creating highlights on your line art car drawings. A standard vinyl eraser works well for removing mistakes cleanly. As for paper, choose a smooth, medium-weight sketch paper. It holds graphite well and allows for easy blending.
Some artists also use blending stumps or tortillons to smooth out their pencil shading. These simple tools help create soft gradients that make your automotive sketch look more polished and professional.
Step-by-Step Guide to Drawing a Car in Black and White
Now let us get into the hands-on part. This drawing tutorial walks you through the process of creating a black and white car drawing from start to finish. Follow each step carefully, and you will be amazed at the results.
Step 1: Observe and Sketch Basic Shapes
Every great car sketch starts with basic shapes. Look at a reference photo of the car you want to draw. Notice how the body can be broken down into rectangles, ovals, and triangles. For example, a sedan might start as a large rectangle with rounded corners, while a sports car might begin with a long, low wedge shape.
Lightly sketch these basic shapes onto your paper. Do not press too hard. Use light, loose lines. This stage is all about getting the car proportions right. If the proportions are off, the rest of the drawing will struggle to look correct.
Step 2: Refine the Outline
Once your basic shapes are in place, start refining the outline. Add details like the wheel arches, door lines, and window shapes. Use your HB pencil for this stage. Keep your lines confident and smooth. If a line is not right, gently erase it and try again.
This is also the time to establish the car outline and overall silhouette. Step back and look at your drawing from a distance. Does it look like the car? Make adjustments as needed before moving on to the next step.
Step 3: Add Guidelines for Shading
Before you start shading, draw light guidelines to map out where the light is coming from. This is crucial for contrast drawing and creating a sense of depth. Decide on your light source and imagine how it would hit the car’s surface.
Areas facing the light will stay lighter, while areas turned away will be darker. Mark these zones lightly on your drawing. This roadmap will guide your pencil shading and help you create a more realistic black and white car drawing.
Step 4: Build Up Tones and Shadows
Now the fun begins. Start building up tones using hatching technique and cross-hatching technique. Hatching means drawing parallel lines in the same direction. Cross-hatching means layering lines in different directions to create darker tones.
Work from light to dark. Start with your HB pencil and gradually move to softer grades. Build up layers slowly rather than trying to get dark areas all at once. This value scale approach gives you much more control over the final result.
Step 5: Add Details and Final Touches
With your base tones in place, it is time to add details. Draw the wheels, headlights, grille, and any other features specific to the car. Use your darker pencils for these elements. Add reflections on the windows and subtle highlights on the body panels to make your car illustration pop.
Take a step back and evaluate your work. Look for areas that need more contrast or refinement. A few final adjustments can make a huge difference in the overall quality of your automotive art.
Shading and Texture Techniques for Car Drawings
Shading is what separates a flat sketch from a compelling black and white car drawing. It gives your vehicle sketching a sense of volume, weight, and realism. Let us explore the most effective techniques.
Hatching and Cross-Hatching
Hatching is one of the most fundamental shading methods in automotive sketching. You draw parallel lines close together to create mid-tones. The closer the lines, the darker the area becomes. Cross-hatching adds a second layer of lines going in a different direction, creating even darker values.
For car drawings, hatching works especially well on flat surfaces like hoods and doors. Cross-hatching is great for curved areas like wheel wells and bumpers where deeper shadows naturally occur. Practice both techniques until they feel natural and comfortable.
Blending and Smudging
Blending creates smooth, gradual transitions between light and dark areas. You can blend with your finger, a blending stump, or a soft cloth. This technique is perfect for rendering the smooth, reflective surfaces of cars.
However, be careful not to over-blend. Too much blending can make your car sketch look muddy and lose detail. A good rule of thumb is to blend selectively, focusing on large, smooth areas like the roof and sides of the car. Leave some texture for areas that need more detail.
Stippling for Texture
Stippling uses small dots to build up tone and texture. This technique works wonderfully for adding subtle surface details to your line art car drawings. Try stippling for textures like leather seats, rough metal, or tire surfaces.
Stippling takes patience, but the results are worth it. It gives your monochrome car art a unique, handcrafted quality that other methods cannot quite replicate. Combine stippling with hatching for a rich, varied texture in your automotive art.
Common Mistakes to Avoid in Black and White Car Drawing
Every artist makes mistakes, especially when learning black and white car drawing. The key is to recognize common pitfalls and avoid them. Here are the mistakes that trip up most beginners.
Skipping the Guidelines
One of the biggest mistakes is jumping straight into details without establishing basic shapes and guidelines. Your car proportions will likely be off, and fixing them later is difficult and frustrating. Always start with light, loose shapes and build up from there.
Ignoring the Light Source
Without a clear light source, your contrast drawing will look flat and confusing. Decide where your light is coming from before you start shading. Consistency in your lighting makes your automotive sketch look believable and three-dimensional.
Pressing Too Hard
Pressing too hard with your pencil makes it nearly impossible to lighten areas later. It also wears down your paper surface. Use light, controlled strokes and build up darkness gradually. Remember, you can always add more graphite, but removing it is much harder.
Neglecting the Wheels and Tires
The wheels and tires are often overlooked, but they are a major focal point of any car drawing. Spend time getting the wheel shapes, spokes, and tire tread details right. A well-drawn wheel can elevate your entire black and white car drawing to the next level.
Tips to Improve Your Black and White Car Drawing Skills
Improving your automotive art takes time and dedication. Here are some practical tips that will help you grow faster and enjoy the process more.
Draw from Reference Photos
Always use reference photos when practicing your car sketch work. Choose clear, high-quality images with good lighting. References help you understand real-world shapes, proportions, and details that you might miss from imagination alone.
Try drawing the same car from multiple angles. A front view, side view, and three-quarter view each teach you different things about vehicle sketching. This practice builds your spatial awareness and makes your pencil drawing more versatile.
Focus on Proportions First
Before adding any shading or details, make sure your proportions are correct. Use a simple grid method if needed. Divide your reference photo and your paper into equal sections, and map the car’s features onto each section.
Good proportions are the foundation of any great black and white car drawing. Even the best shading techniques cannot save a drawing with incorrect proportions. Spend extra time on this stage, and the rest will come much easier.
Practice Gesture Drawing
Gesture drawing involves quick, loose sketches that capture the essence of a pose or form. For car drawing, this means doing fast 5-10 minute sketches that focus on the overall flow and movement of the vehicle. This exercise trains your eye and hand to work together more fluidly.
Set a timer and challenge yourself to complete a car outline in under 10 minutes. Do not worry about perfection. The goal is to capture the feeling and energy of the car. Over time, you will notice your automotive sketch skills improving dramatically.
Study How Light Interacts with Car Surfaces
Cars have unique surfaces that interact with light in interesting ways. Chrome bumpers reflect light sharply, while matte paint absorbs it. Curved glass creates complex highlights and reflections. Understanding these surface qualities helps you render them more accurately in your monochrome car art.
Spend time observing real cars in different lighting conditions. Notice how the shadows fall on the body panels. Pay attention to the subtle gradients on curved surfaces. This observation will directly improve the quality of your car illustration work.
Expert Insights on Mastering Black and White Car Drawing
We spoke with several professional automotive artists to gather their top tips for mastering black and white car drawing. Here is what they had to say.
Start simple. Many beginners try to tackle complex sports cars right away. Instead, start with basic shapes like a simple sedan or a classic car. Build your confidence and skills before moving on to more challenging subjects. As one artist put it, “Master the boxy car before you try the curve car.”
Patience is everything. Black and white car drawing rewards patience more than almost any other art form. Rushing through steps leads to mistakes that compound over time. Take your time with each stage, and trust the process.
Compare constantly. Professional artists compare their drawing to the reference photo constantly. They flip back and forth, checking proportions, angles, and shadows. This habit keeps your work accurate and helps you catch errors early.
Embrace mistakes. Every artist, no matter how experienced, makes mistakes. The key is to see them as learning opportunities. Each error in your automotive sketch teaches you something that makes your next drawing better.
Conclusion
Black and white car drawing is a rewarding and timeless art form that anyone can learn. With the right tools, a solid understanding of basic shapes, and consistent practice, you can create impressive car illustrations that capture the essence of any vehicle. Remember to start with simple shapes, build up your pencil shading gradually, and always pay attention to your light source.
The journey of automotive art is one of continuous learning and improvement. Every drawing you complete teaches you something new about vehicle sketching and car proportions. Keep practicing, keep studying, and most importantly, keep enjoying the process. Your skills will grow faster than you think, and the satisfaction of creating a beautiful black and white car drawing is truly unmatched.
Now pick up your pencil, grab a reference photo, and start drawing. The road to mastering black and white car drawing begins with a single line. Make it a great one.
Frequently Asked Questions
What pencils are best for black and white car drawing?
A set of pencils ranging from HB to 6B gives you the best control for black and white car drawing. Use harder pencils for light lines and softer pencils for dark shadows and deep contrasts.
How long does it take to learn black and white car drawing?
Most beginners see noticeable improvement within a few weeks of regular practice. However, mastering automotive art takes months or even years of consistent effort. The key is to practice regularly and be patient with your progress.
Can I use a pen instead of a pencil for car sketching?
Yes, you can use a pen for car illustration work. Pens create crisp, permanent lines that give your line art car drawings a bold, confident look. However, pencils offer more flexibility for shading and corrections, which is why many artists prefer them for black and white car drawing.
Do I need expensive paper for pencil car drawings?
No, you do not need expensive paper. A smooth, medium-weight sketch paper works perfectly for automotive sketch and pencil drawing. The most important thing is that the paper holds graphite well and allows for easy erasing and blending.
How can I make my black and white car drawing look more realistic?
Focus on accurate car proportions, consistent lighting, and smooth pencil shading transitions. Adding subtle highlights, reflections, and fine details like wheel spokes and body lines also makes your car sketch look more realistic and professional.
Should I trace reference photos when learning car drawing?
Tracing can be a helpful learning tool in the beginning, but it should not replace freehand practice. Use tracing to understand shapes and proportions, then gradually transition to drawing from observation. This approach builds your drawing techniques and helps you develop the skills needed for independent black and white car drawing.
=== URL SLUG ===
black-and-white-car-drawing-tutorial