Car Side Mirror Glass Replacement Guide for Beginners
Replacing your car side mirror glass doesn’t have to be expensive or complicated. This beginner-friendly guide walks you through every step, from buying the right glass to installing it safely. You’ll learn the tools you need, common mistakes to avoid, and when to call a professional. Side mirror glass replacement is one of the simplest DIY car maintenance tasks you can tackle at home with basic tools and a little patience.
Your car’s side mirror glass takes a beating every day. Rocks fly up from the highway. Parking bumps in tight spots. Extreme weather throws its own challenges. At some point, almost every driver faces a cracked, chipped, or shattered mirror.
The good news? Car side mirror glass replacement is one of the easiest and most affordable repairs you can do yourself. You don’t need to be a mechanic. You don’t need fancy equipment. A few basic tools, a replacement glass piece, and about half an hour is all it takes. This guide is built for beginners who have never touched a mirror replacement before.
Whether your mirror cracked from a stray pebble on the interstate or someone dented it in a parking lot, you’re in the right place. We’ll cover everything from choosing the correct glass to the final calibration steps. By the end, you’ll feel confident tackling this repair on your own.
Key Takeaways
- DIY-Friendly Task: Most drivers can replace side mirror glass at home with basic tools and about 30 minutes of time.
- Cost Savings: Doing it yourself can save you $50 to $150 compared to a dealership or auto shop.
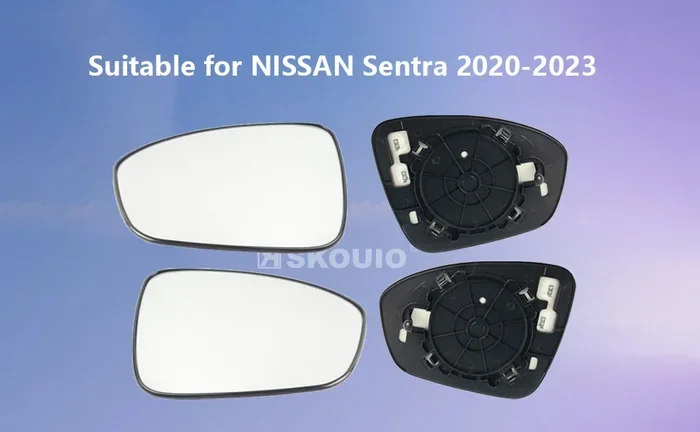
- Right Glass Matters: Always match your mirror glass type — convex, flat, or heated — to your vehicle’s specifications.
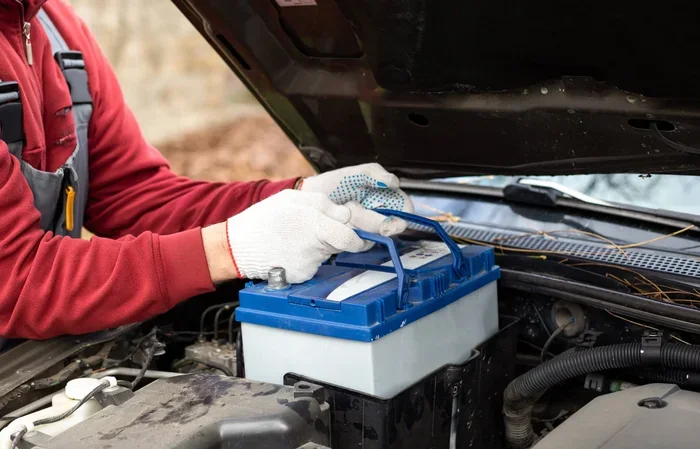
- Safety First: Disconnect the battery and handle broken glass carefully to avoid injury during replacement.
- Maintenance Extends Life: Regular cleaning and protective measures keep your new mirror glass lasting for years.
- Know When to Call a Pro: Power mirrors, integrated turn signals, or complex housings may need professional installation.
📑 Table of Contents
- Why Side Mirror Glass Gets Damaged
- Tools and Materials You’ll Need
- Step-by-Step Side Mirror Glass Replacement
- Common Mistakes to Avoid
- When to Call a Professional
- Tips for Maintaining Your New Mirror Glass
- Cost Breakdown: DIY vs Professional Replacement
- Frequently Asked Questions About Side Mirror Glass Replacement
- Final Thoughts
Why Side Mirror Glass Gets Damaged
Understanding why mirrors break helps you prevent future damage. Most drivers don’t think about their mirrors until something goes wrong. But a little awareness goes a long way in keeping your exterior mirror intact.
Road Debris and Rock Chips
The number one cause of mirror damage is road debris. Gravel, rocks, and dirt kicked up by other vehicles hit your mirror at high speed. Even small stones can crack or chip the glass. Highway driving increases this risk significantly. The faster you go, the harder those impacts hit.
Parking Lot Accidents
Tight parking spaces are another culprit. Doors from neighboring cars swing open and clip your mirrors. You might back into a pole or wall. These low-speed impacts still pack enough force to crack mirror glass. Parking lots are where most mirror damage happens.
Weather and Environmental Factors
Extreme temperatures cause mirror glass to expand and contract. Over time, this stress creates tiny cracks that grow. Ice and snow removal can also chip or shatter the glass if done aggressively. Hail storms are particularly destructive to exposed mirror surfaces.
Age and Wear
Even without a specific impact, mirror glass degrades over time. UV exposure weakens the glass. Old adhesive fails, causing the mirror to vibrate and loosen. Eventually, a small vibration turns into a crack. Older vehicles are especially vulnerable to this type of gradual damage.
Tools and Materials You’ll Need
Before you start, gather everything you need. Having all your materials ready prevents frustration mid-project. Here’s a complete list for your mirror glass replacement job.
Essential Tools
- Replacement mirror glass — sized specifically for your vehicle model
- Adhesive or epoxy — mirror-specific bonding compound (most replacements use an adhesive backing)
- Rubbing alcohol or glass cleaner — for cleaning the surface before bonding
- Microfiber cloths — lint-free wipes for a clean surface
- Protective gloves — safety first, especially with broken glass
- Masking tape — helps hold pieces in place during installation
- Small flathead screwdriver or trim tool — for removing the old mirror housing
- Utility knife or razor blade — for cleaning old adhesive residue
Optional but Helpful Items
- Dental pick or toothpick — useful for applying adhesive in tight spots
- Painter’s tape — protects surrounding paint from adhesive drips
- Flashlight — helps you see inside the mirror housing
- Ziplock bag — for safely collecting broken glass pieces
Pro tip: Buy your replacement glass before you start. You can find side mirror glass for most vehicles online for $10 to $40. Make sure you confirm the shape, size, and type match your car exactly.
Step-by-Step Side Mirror Glass Replacement
Now for the fun part. This step-by-step process works for most standard side mirrors. If you have a power-adjustable or heated mirror, we’ll note where things differ.
Step 1: Remove the Old Mirror Glass
Put on your protective gloves first. Place a ziplock bag over the broken glass pieces. Gently tap any remaining shards into the bag. This keeps broken glass from scattering and keeps your hands safe.
Once the big pieces are cleared, use masking tape to cover any remaining small fragments. Gently peel the tape away to remove tiny shards. Wipe the area clean with a microfiber cloth.
Now inspect the mirror housing. Look for any remaining old adhesive. Use a razor blade or utility knife to carefully scrape away the old bonding material. Clean the housing surface with rubbing alcohol and let it dry completely.
Step 2: Prepare the New Mirror Glass
Take your new replacement glass out of the packaging. Most aftermarket mirror glass comes with a pre-applied adhesive backing. Peel off the protective film from the adhesive side.
If your replacement glass doesn’t have adhesive, you’ll need to apply mirror-specific epoxy yourself. Use a dental pick to spread a thin, even layer on the back of the new glass. Less is more here — too much adhesive creates a mess.
Step 3: Attach the New Glass
Position the new glass onto the mirror housing. Press it firmly into place. Hold it steady for about 30 seconds to let the initial bond set.
Use masking tape to hold the glass in position while the adhesive cures. This prevents any shifting. Let the mirror sit undisturbed for at least one hour — ideally two to four hours for a full bond.
Step 4: Clean Up and Inspect
Remove the masking tape carefully. Wipe away any excess adhesive with a clean microfiber cloth. Check that the new glass sits flush against the housing with no gaps or bubbles.
For power mirrors, plug the electrical connector back in. Test the mirror adjustment in all directions. For heated mirrors, test the heating function too. Everything should work smoothly with the new glass in place.
Quick Tip: If you drive frequently, wait at least 24 hours before exposing the mirror to high-pressure car washes or heavy rain. This gives the adhesive time to reach full strength.
Common Mistakes to Avoid
Even simple repairs go wrong when you skip steps or rush through them. Here are the most common mistakes people make during side mirror glass replacement — and how to avoid them.
Skipping the Cleaning Step
Dirty surfaces prevent adhesive from bonding properly. This is the single most common reason mirror glass falls off after replacement. Always clean the housing with rubbing alcohol and let it dry completely before applying the new glass.
Using the Wrong Adhesive
Not all adhesives work for mirror glass. Super glue and general-purpose glues fail under vibration and temperature changes. Always use a mirror-specific bonding compound or the adhesive that comes with your replacement glass.
Touching the Adhesive Surface
Oil from your fingers weakens the bond. Avoid touching the adhesive side of the new glass. Handle it by the edges only. If you accidentally touch it, clean it with rubbing alcohol before installation.
Rushing the Cure Time
It’s tempting to test the mirror right away. But adhesive needs time to set. Waiting at least one hour — and ideally longer — ensures a strong, lasting bond. Patience pays off here.
Ignoring the Mirror Housing
Sometimes the housing itself is damaged, not just the glass. If the housing is cracked, bent, or the motor is malfunctioning, replacing just the glass won’t solve the problem. Inspect the entire mirror assembly before you begin.
When to Call a Professional
DIY replacement works great for most standard mirrors. But some situations call for a professional touch. Knowing when to stop and call an expert saves you time, money, and frustration.
Power-Adjustable Mirrors
Power mirrors have electrical components built into the housing. Replacing the glass on these units requires extra care around wiring and motors. If you’re uncomfortable working with electrical parts, a professional is the safer choice.
Integrated Turn Signals
Many modern vehicles have turn signals built into the side mirror. These involve wiring connections that are tricky to disconnect and reconnect without damage. If your mirror has this feature, consider professional replacement.
Heated Mirror Glass
Heated mirrors contain thin heating elements embedded in the glass. These are fragile and can be easily damaged during replacement. If you’re not experienced with delicate electrical components, let a professional handle it.
Damaged Mirror Housing
If the housing itself is cracked, bent, or the mounting bracket is broken, you need more than a glass swap. A professional can assess whether the entire mirror assembly needs replacement. They can also ensure proper mirror calibration for safe driving.
Expert Insight: According to most auto repair shops, the cost of professional mirror glass replacement ranges from $75 to $200 depending on your vehicle. DIY saves you the labor cost, but only attempt it if you feel comfortable with the process.
Tips for Maintaining Your New Mirror Glass
You just replaced your mirror glass. Great! Now let’s keep it looking and functioning great for years to come. A little maintenance goes a long way.
Clean It the Right Way
Use a microfiber cloth and a gentle glass cleaner. Avoid abrasive cleaners or rough sponges that can scratch the glass. Clean your mirrors regularly — especially after long road trips where debris buildup is heavy.
Protect It from Impact
While you can’t prevent every rock chip, you can reduce the risk. Park away from busy highways when possible. Avoid following trucks too closely on gravel roads. A car windshield sunshade won’t protect your mirrors directly, but overall UV protection helps preserve all your car’s exterior surfaces.
Check the Adhesive Periodically
Every few months, gently press on your mirror glass to check the bond. If it feels loose or wobbly, address it immediately. A loose mirror glass can fall off while driving, creating a safety hazard and potential road debris.
Address Small Chips Quickly
A small chip today becomes a large crack tomorrow. If you notice any damage, repair it early. Many auto parts stores sell mirror glass repair kits for minor chips. These are cheap and easy to apply.
Cost Breakdown: DIY vs Professional Replacement
Wondering how much you’ll save by doing this yourself? Here’s a quick comparison of costs for side mirror glass replacement.
- DIY Replacement: $10 to $40 for the glass piece. Total cost is just the replacement part.
- Professional Replacement: $75 to $200 depending on the vehicle and shop. Includes labor and parts.
- Dealership Replacement: $150 to $350 typically. OEM parts and specialized service.
The savings from DIY are significant. But remember, your time and comfort level matter too. If you’re unsure, a professional installation is always a worthwhile investment.
Frequently Asked Questions About Side Mirror Glass Replacement
Can I drive with a cracked side mirror glass?
It depends on the severity of the crack. A small chip that doesn’t obstruct your view is generally legal to drive with in most states. However, a large crack that limits your side visibility is unsafe and may violate traffic laws. Replace damaged mirror glass as soon as possible for safe driving.
How long does side mirror glass replacement take?
For most beginners, the entire process takes about 30 to 45 minutes. Experienced DIYers can finish in under 20 minutes. The adhesive curing time adds a couple of hours, but you don’t need to sit and wait — just let the mirror sit undisturbed after installation.
Do I need any special tools for mirror glass replacement?
No special tools are required. Basic household items like rubbing alcohol, a microfiber cloth, masking tape, and a razor blade are all you need. The replacement glass usually comes with its own adhesive backing, so no special equipment is necessary.
Can I replace just the glass and keep the same mirror housing?
Yes, in most cases. Replacement mirror glass is designed to fit into existing housings. This is much more affordable than replacing the entire mirror assembly. Just make sure the housing itself is in good condition before installing the new glass.
What type of mirror glass do I need for my car?
Check your vehicle’s owner manual or look up your specific make, model, and year online. Mirrors come in different shapes — convex, flat, or aspherical. Some vehicles also have heated mirrors or built-in turn signals that require specific glass types. Match your replacement exactly to avoid fitment issues.
Is side mirror glass replacement covered by insurance?
Many comprehensive auto insurance policies cover mirror glass replacement with no deductible. Check with your insurance provider to confirm your coverage. Some policies even cover the cost of a professional replacement, so DIY might not always save you money depending on your plan.
Final Thoughts
Car side mirror glass replacement is one of the most rewarding DIY repairs you can do. It saves money, builds your confidence, and keeps your vehicle safe and road-ready. With the right tools, the correct replacement glass, and a little patience, you can finish this job in under an hour.
Start by gathering your materials and following each step carefully. Don’t rush the adhesive curing process. Take your time, work carefully, and you’ll have a crystal-clear mirror that looks and functions like new.
If at any point you feel unsure or encounter unexpected complications, don’t hesitate to consult a professional. There’s no shame in asking for help. The goal is a safe, properly functioning mirror — however you get there.
Now that you know how to replace your side mirror glass, you’re better equipped to handle this common car maintenance issue. Share this guide with a friend who might need it, and keep your vehicle running smoothly for miles to come.